Using the Free Basic Box Designer generator, you can create fun and unique gifts! In this tutorial, I’ll walk you through the steps I used to design a custom matchbox for a Valentine’s Day gift.
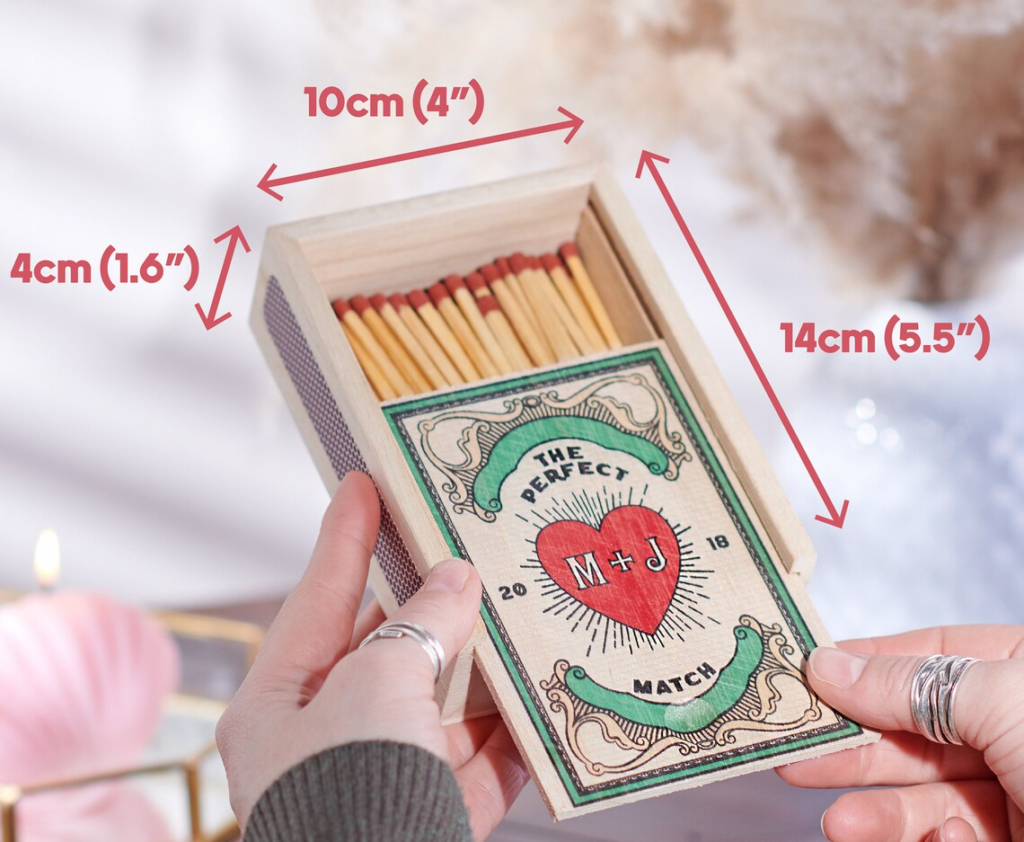
This idea came to me while browsing Etsy for a gift, where I stumbled upon this product:
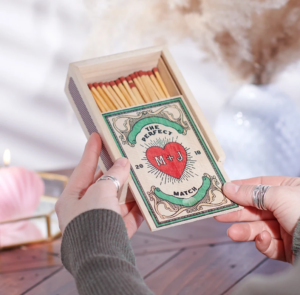
This product is extremely popular. Using the Free Basic Box Designer, I designed and assembled a similar product using my own variation and twist.
I created a video documenting my design and assembly process:
The Etsy matchbox uses a slide-lid box design, but I want to re-create something similar using a two-box approach. An outer ‘Sleeve’ and inner ‘Drawer’ style design.

The Etsy product matchbox is fairly large and is ideal for 4″ matches. I don’t have any large matches readily available, but I do have some smaller 2.2″ matches.

Because I’m using small matches, I will need to make my matchbox design half the size of the Etsy product.
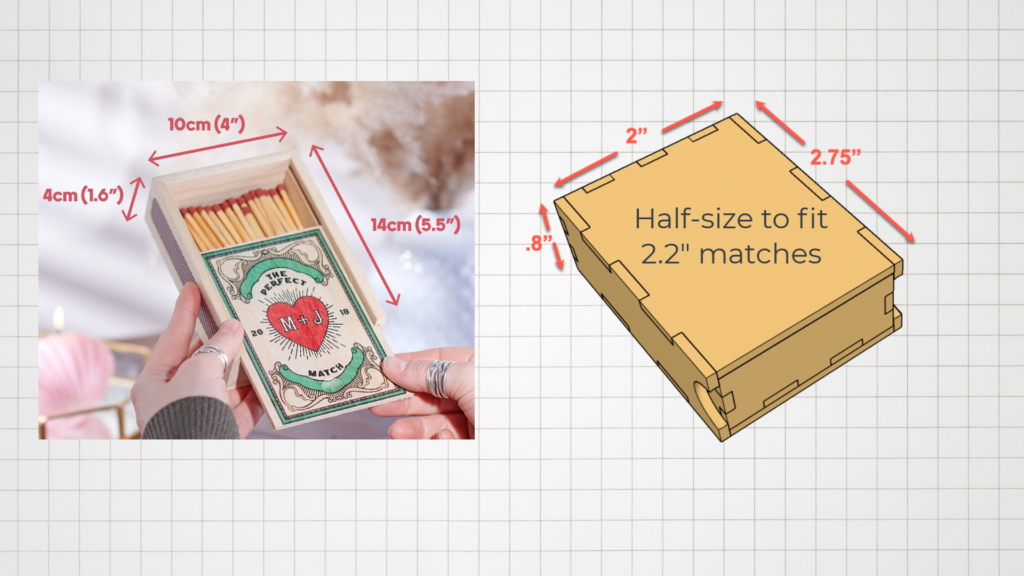
This makes the final outer box dimensions L/W/H 2.75″x 2″x .8″
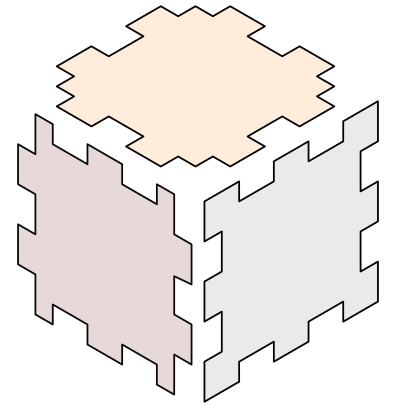
Now that we have our box specifications, let’s begin designing the boxes within the Basic Box Designer generator application, which will produce an SVG file that can easily be imported and cut on any laser cutting machine.
To get started head over to the Cutgen website to sign-up for a FREE account which will give you access to the Basic Box Designer generator application.
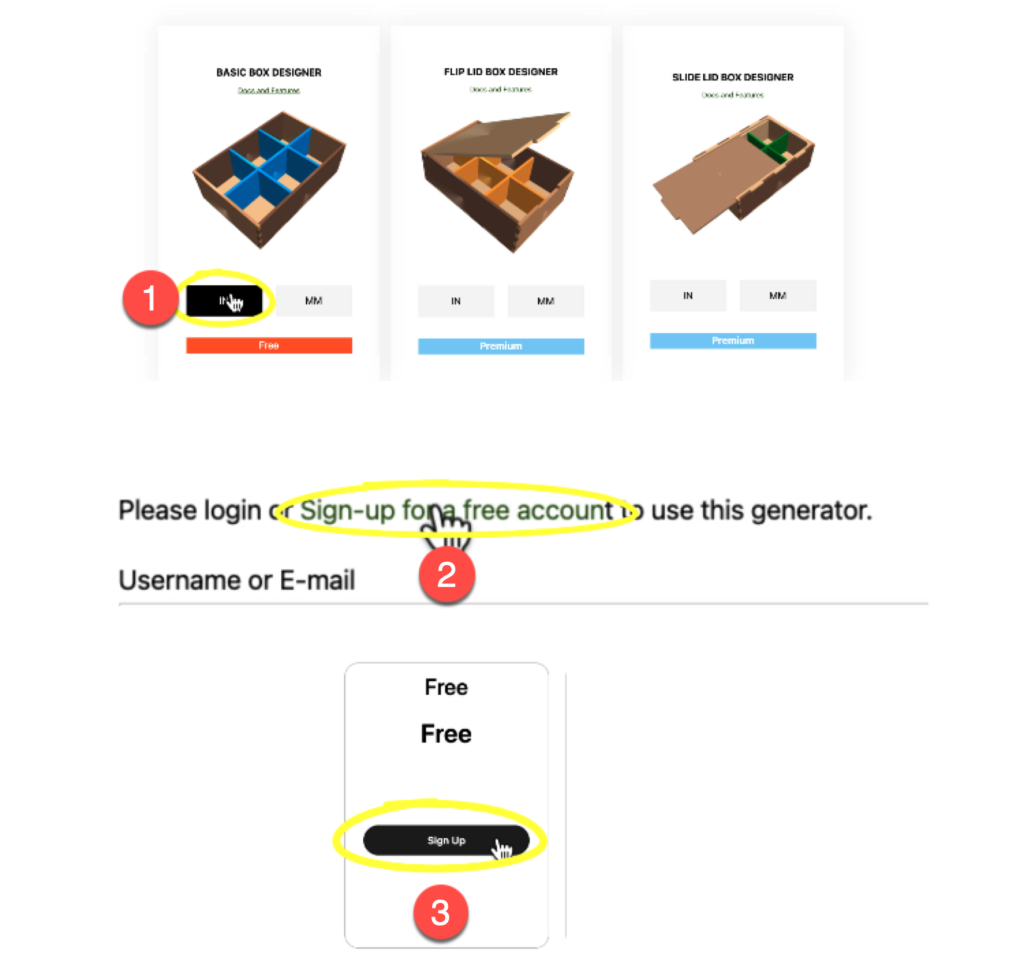
Now that the free account is created, login (if prompted) and click on the Basic Box Designer ‘IN’ button.
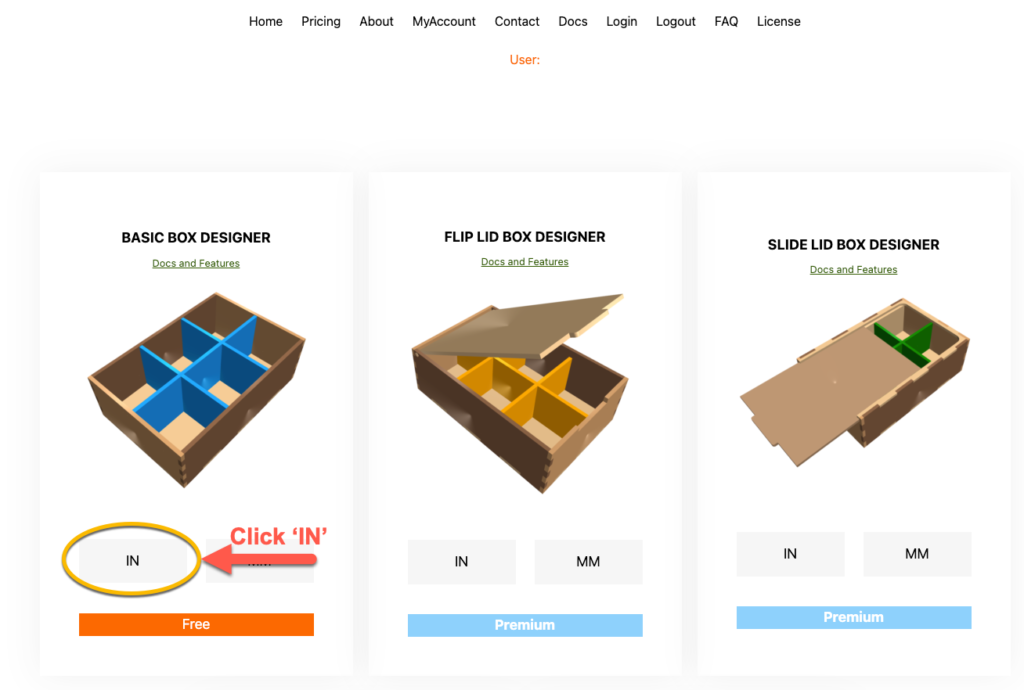
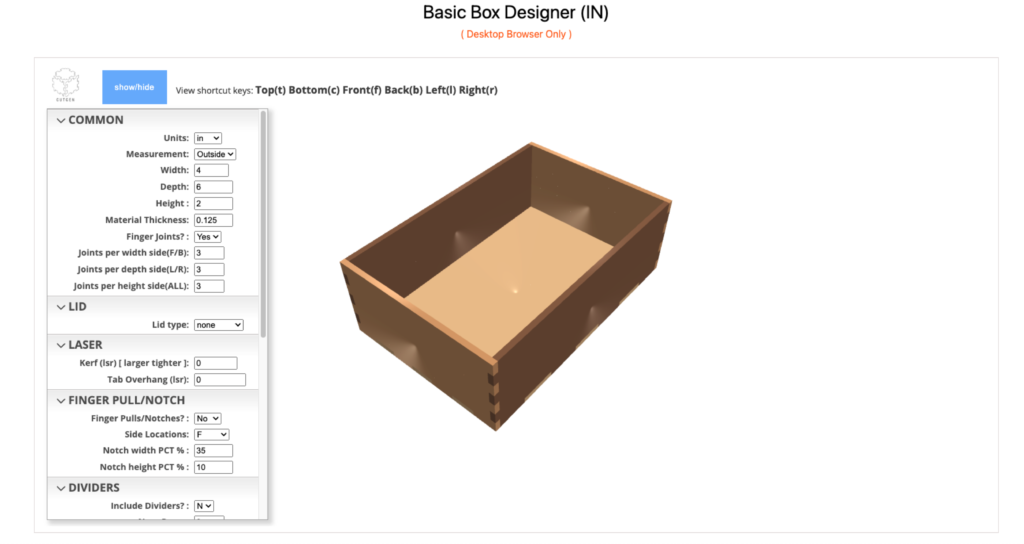
This will launch the Basic Box Designer application where I will design the inner and outer boxes. I will be entering values into the input parameters located on the left. If you’d like more details on all the available parameters, be sure to check out the Basic Box Designer Documentation
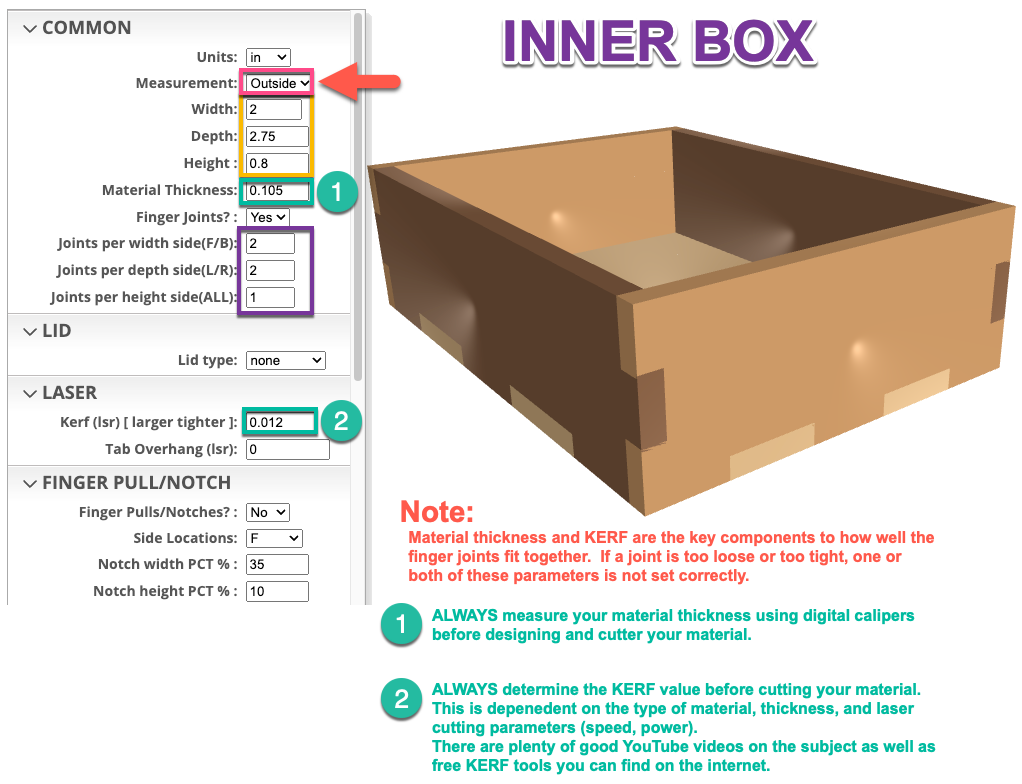
We will begin with the inner box design. Manually enter the values as shown below. To avoid confusion and frustration, please pay special attention to the notes related to Material Thickness and KERF. The values shown, are the values I have determined based on the type and thickness of the Basswood I’m using. Your values will be different.
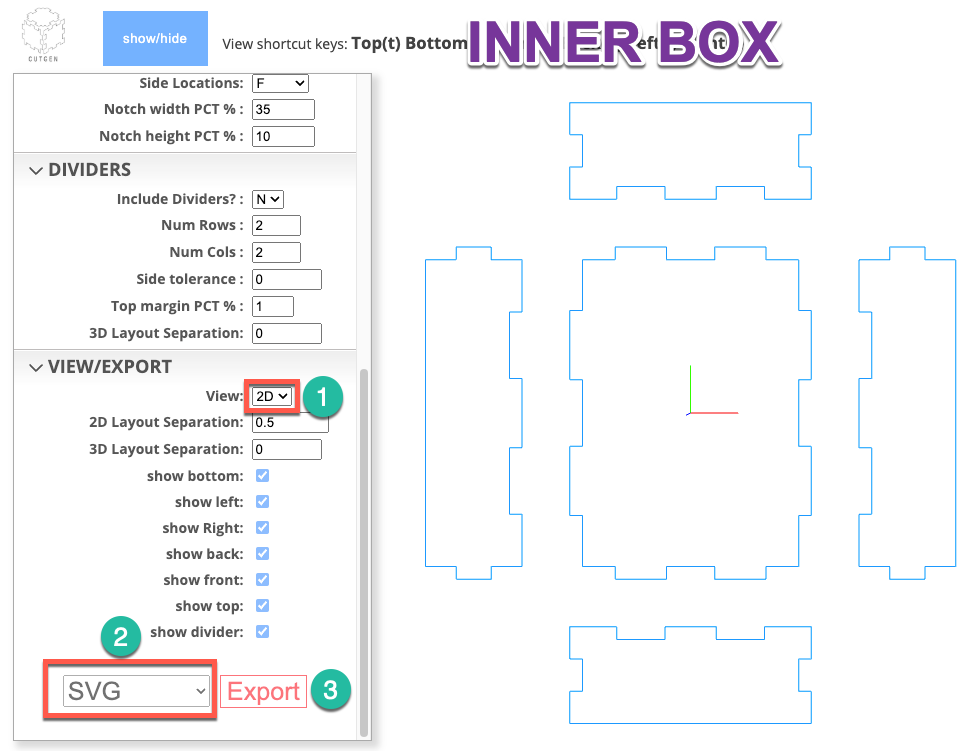
Next, switch to ‘2D’ View and then export the design to an SVG file.
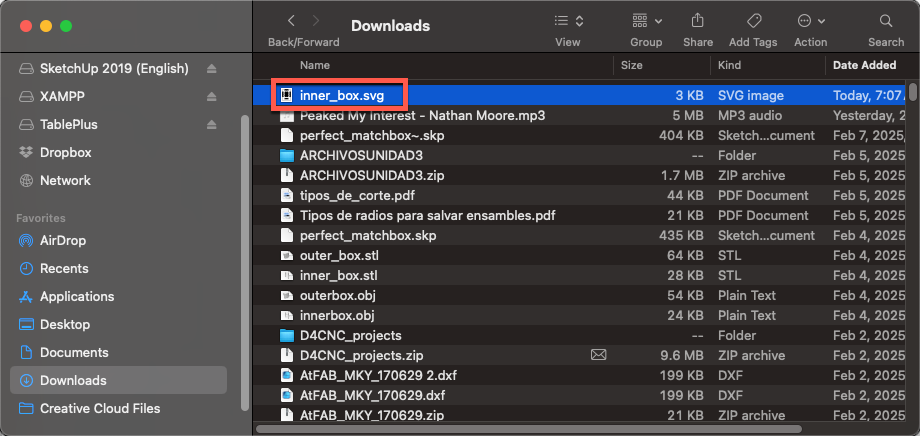
Once downloaded, open the ‘Downloads’ folder and rename the downloaded file to ‘inner_box.svg’
Now that we have have completed the design of the inner box, let’s go ahead and repeat the same process, but now for the outer box.
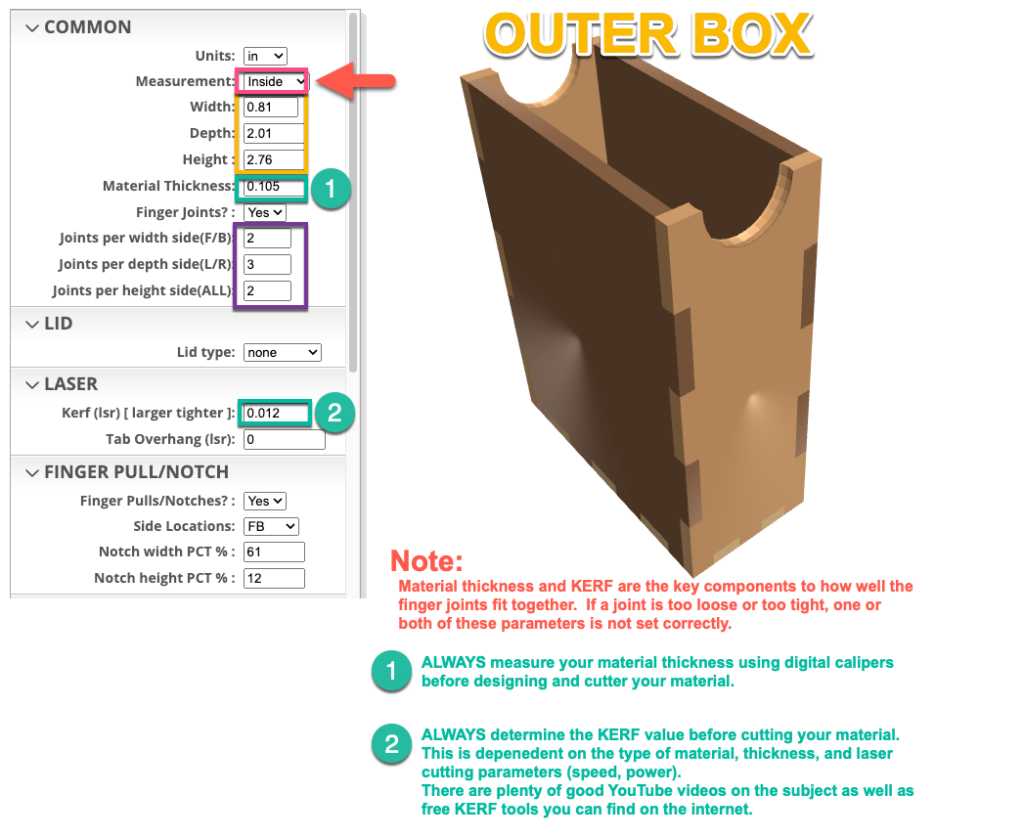
Back inside the Basic Box Designer interface, input the following parameters. To avoid confusion and frustration, please pay special attention to the notes related to Material Thickness and KERF. The values shown, are the values I have determined based on the type and thickness of the Basswood I’m using. Your values will be different.
Next, switch to ‘2D’ View and then export the design to an SVG file.
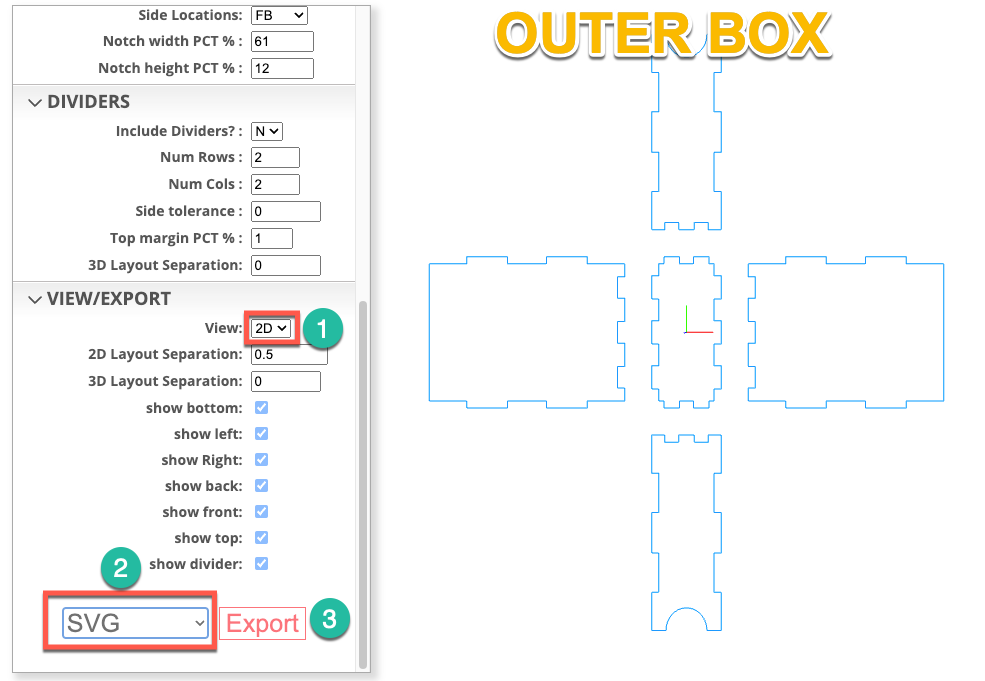
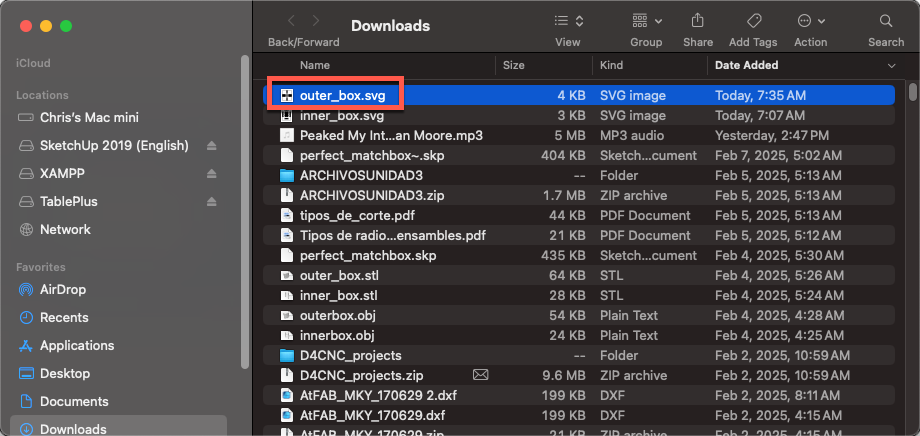
Once downloaded, open the ‘Downloads’ folder and rename the downloaded file to ‘outer_box.svg’
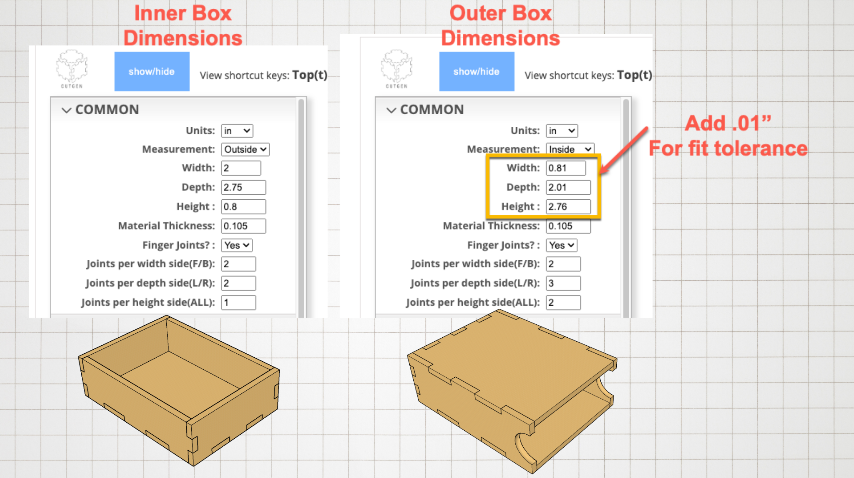
NOTE: You may have noticed that the ‘inside‘ measurement values of the outer box are slightly larger than the ‘outer‘ measurement value of the inner box. This allows for a ‘Fit Tolerance‘ which will give a small amount of clearance around the inner box so that the drawer can slide easily in and out.
You may have also noticed that I’ve swapped the (Width / Depth / Height) axis for the outer box. The only reason for this is because the ‘Finger pull/Notches’ can only be oriented vertically.
Now that we have our two SVG files, I’ll import them into my laser cutting machine and cut them out.
I own a Glowforge machine and will be demonstrating the cutting process within the Glowforge application. If you don’t own a Glowforge, the importing of the SVG files and cutting process should be similar, but you’ll need to consult your manufacturers documentation.
The next step in this process is to import both the ‘inner_box.svg’ and ‘outer_box.svg’ files into the laser cutter. In my case, I’m importing them into my Glowforge application for cutting. Once imported, I manually re-position the pieces to better fit my material size.
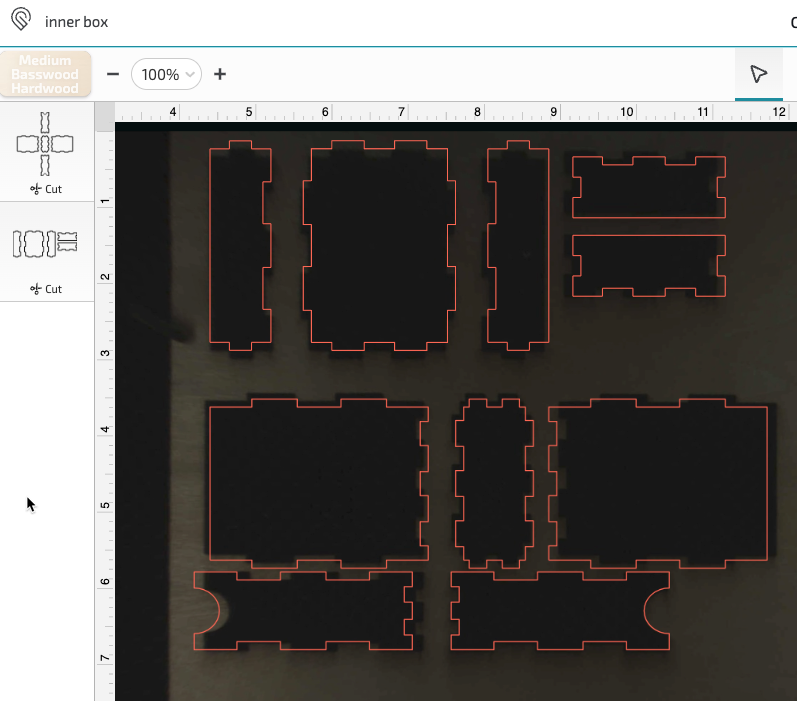
next I’ll hit ‘Print’ to cut-out all of the box pieces.

Now it’s time to add a custom design to the outer box lid. You can create your own custom design in any vector based software (Illustrator, Inkscape, etc) of your choosing. For convenience, I created my design directly inside my Glowforge application. I’ve chosen to do an ‘engrave‘ operation on this design. My basic design is fast and easy. A couple of text objects and a heart icon. This is your opportunity create your own custom masterpiece.
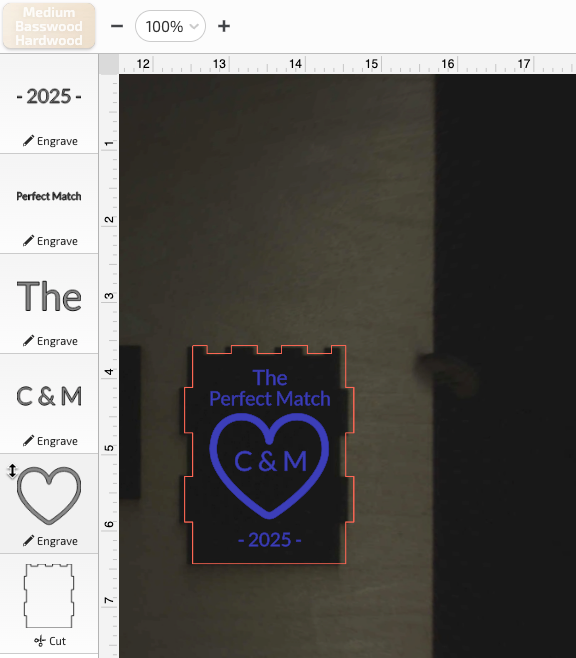
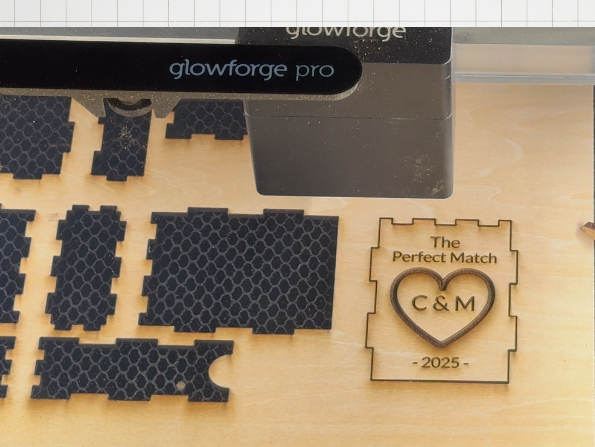
Next, I’ll engrave and cut the top lid design.
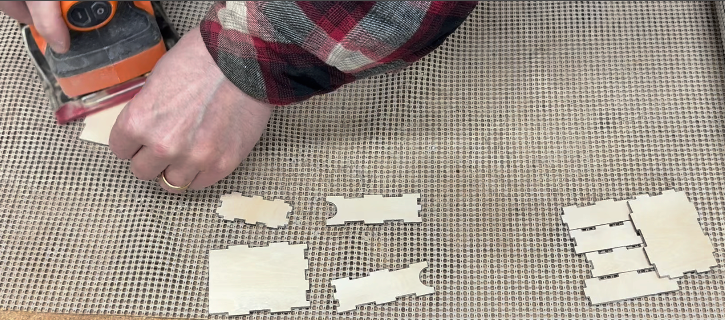
next, using an orbital sander, sand the front and back of all the cut pieces. I used 150 grit and only took a few minutes. I used compressed air to blow off the pieces.
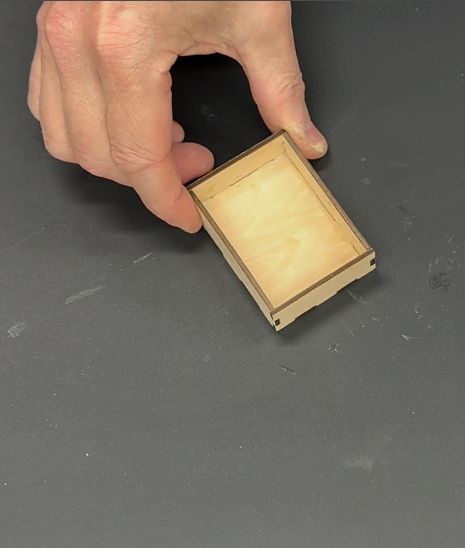
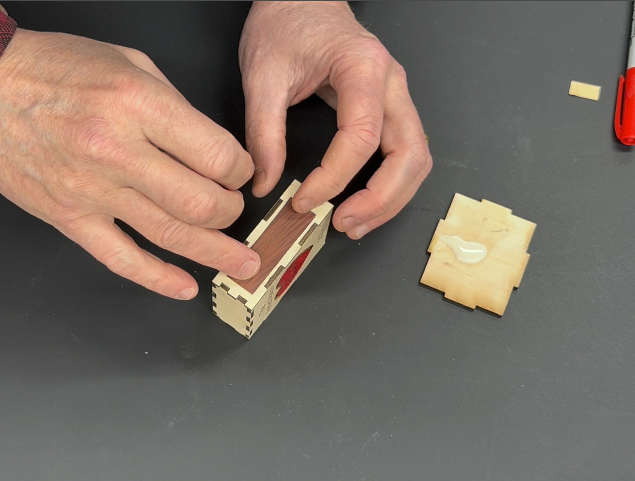
Next, glue the inner box pieces together. After assembly, be sure to cleanup any excess glue ‘squeeze out’.
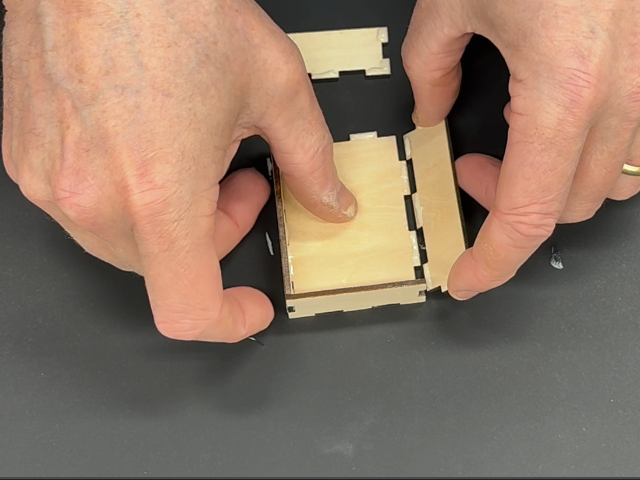
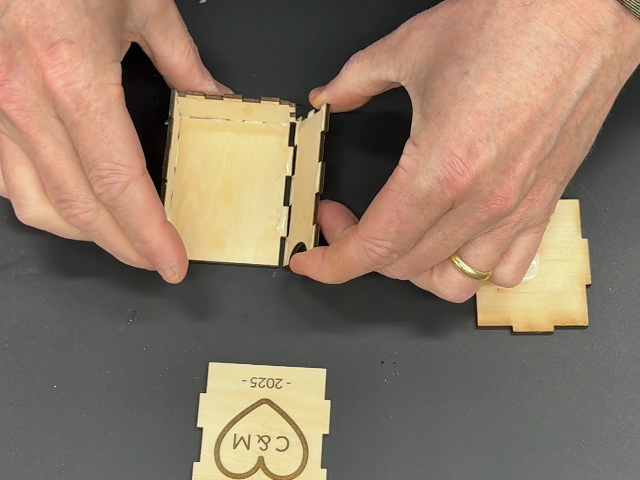
Next, let’s assemble the outer box

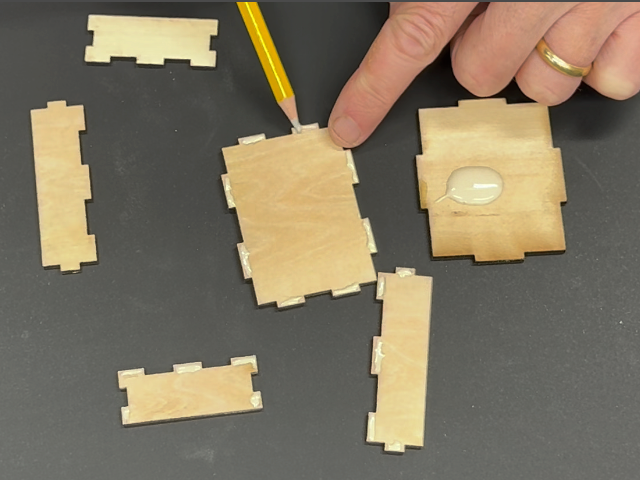
NOTE: It’s very important to remove any excess glue along the inside corners of the outer box to ensure the inner box slides in/out without restriction. You can use a thin sharp tool. I used a mechanical pencil with the lead retracted to run along the inside corners before the glue hardens.

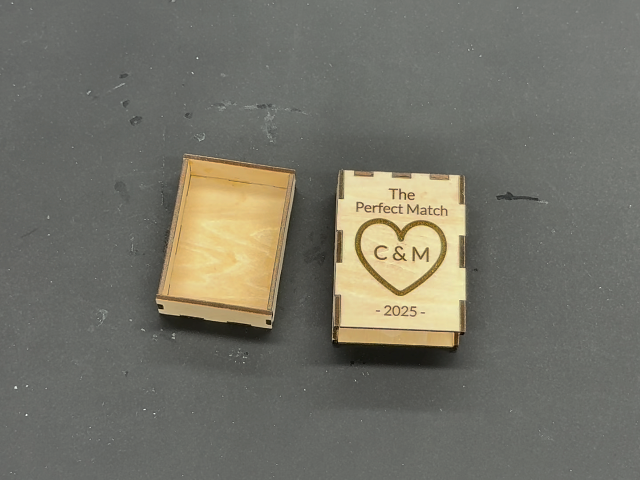
Now the gluing and assembly of both the inner and outer boxes is completed.
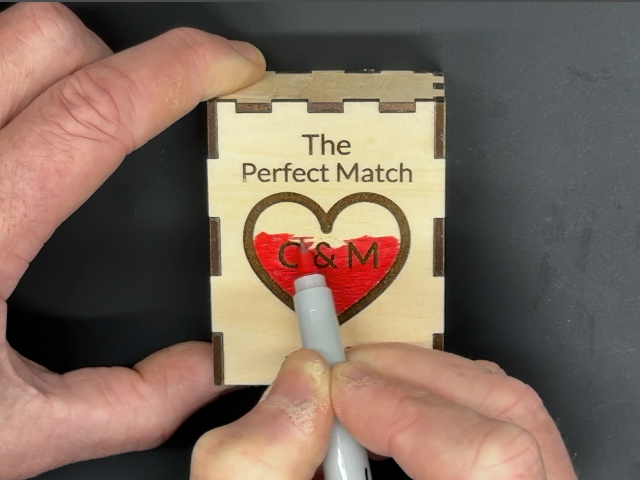
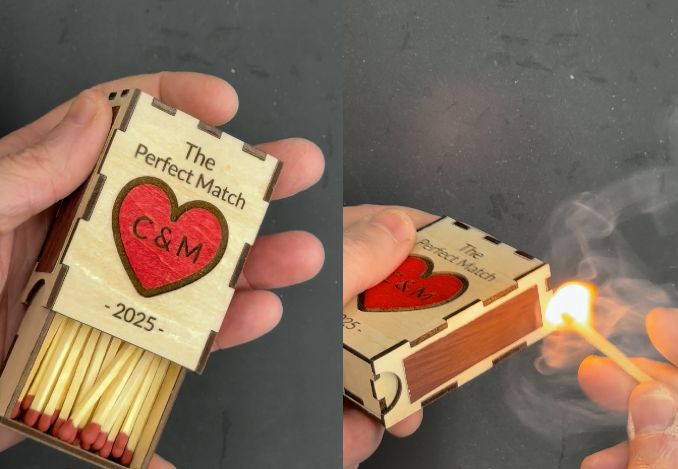
The lid design looks a little boring, so I’m going to use a red sharpie to add some color to the Heart.
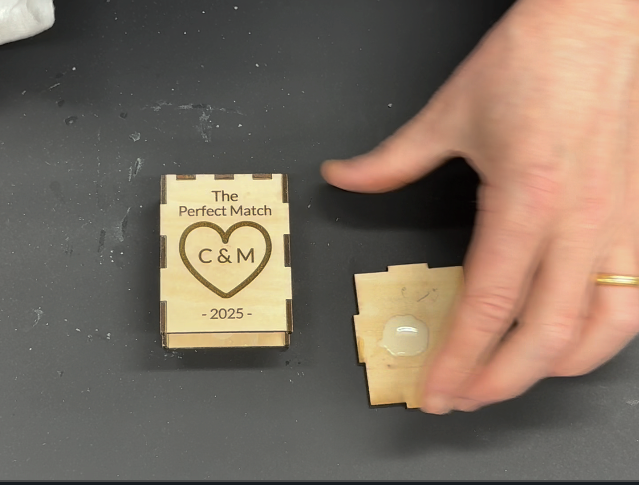
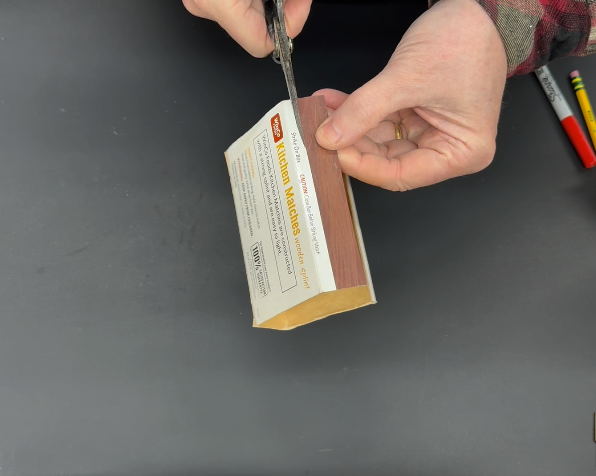
I don’t have an match strike paper, so I cut some off of a match box I had and glued to the outside. Another option is to purchase some strike paper on Amazon.
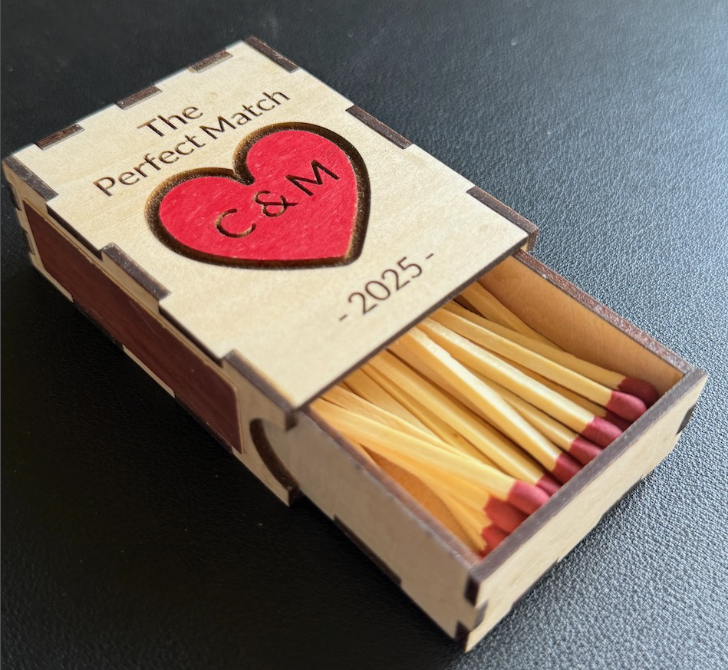
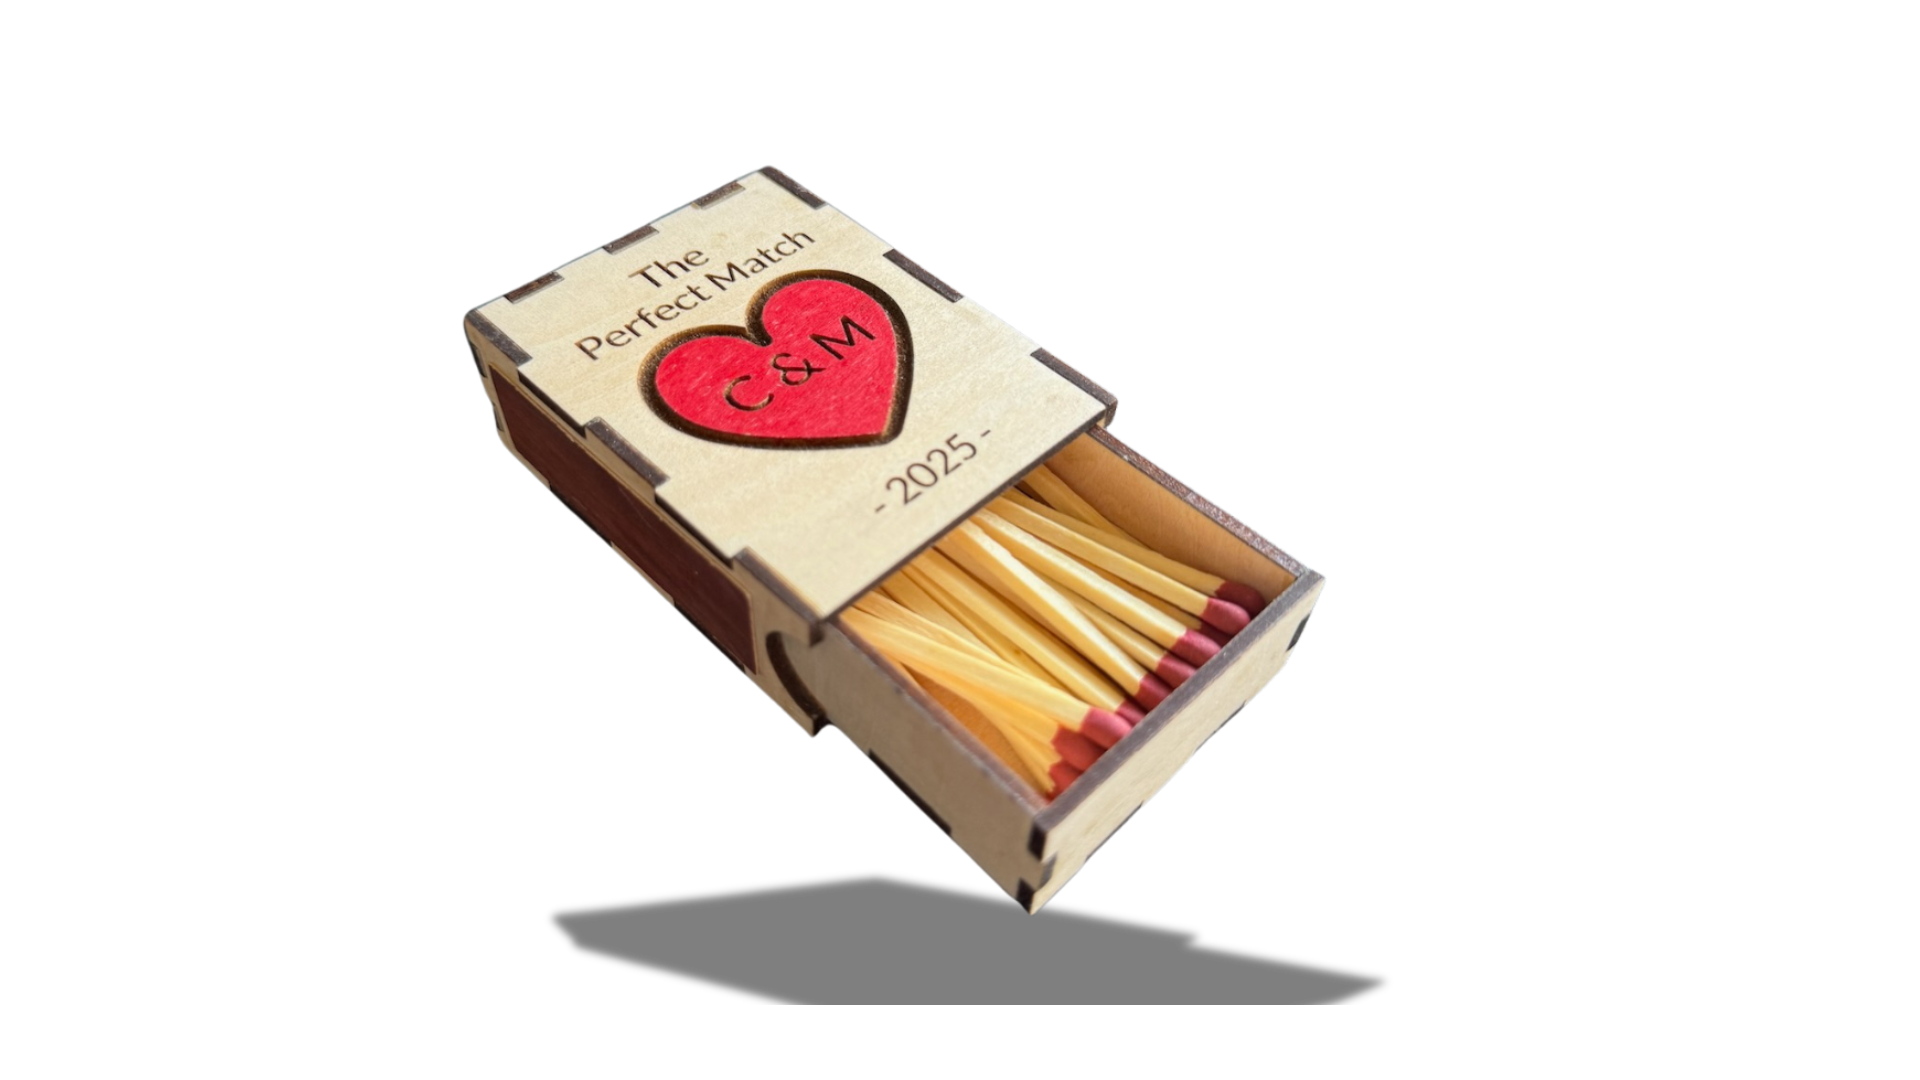
And now we have the final product.
That’s it. Thanks for following along.